Search FAQ / How do I get started with my iRig? (Set-up how-to)
How do I get started with my iRig? (Set-up how-to)
Each iRig device is slightly different, some are designed for audio input from sources like guitar, microphones, basses, and others are designed to send MIDI (Musical Instrument Digital Interface) data to the connected device.
To get started with an audio based iRig on iOS or Mac follow these steps. For compatible devices, Windows users can find instructions on getting started here.
- Register your iRig device to unlock any included software. An email will be sent to you showing what you've just unlocked. Click here for a full how-to on unlocking and downloading your iOS, Android, or Mac/PC software.
- Connect your headphones or speakers to your iRig, then connect your iRig to your iOS or Mac system and launch your associated software.
- Mac users will need to select their audio device in the Audio MIDI set up for the software being used.* iOS users can get started right away when using an IK Multimedia app.**
- Get started making music.
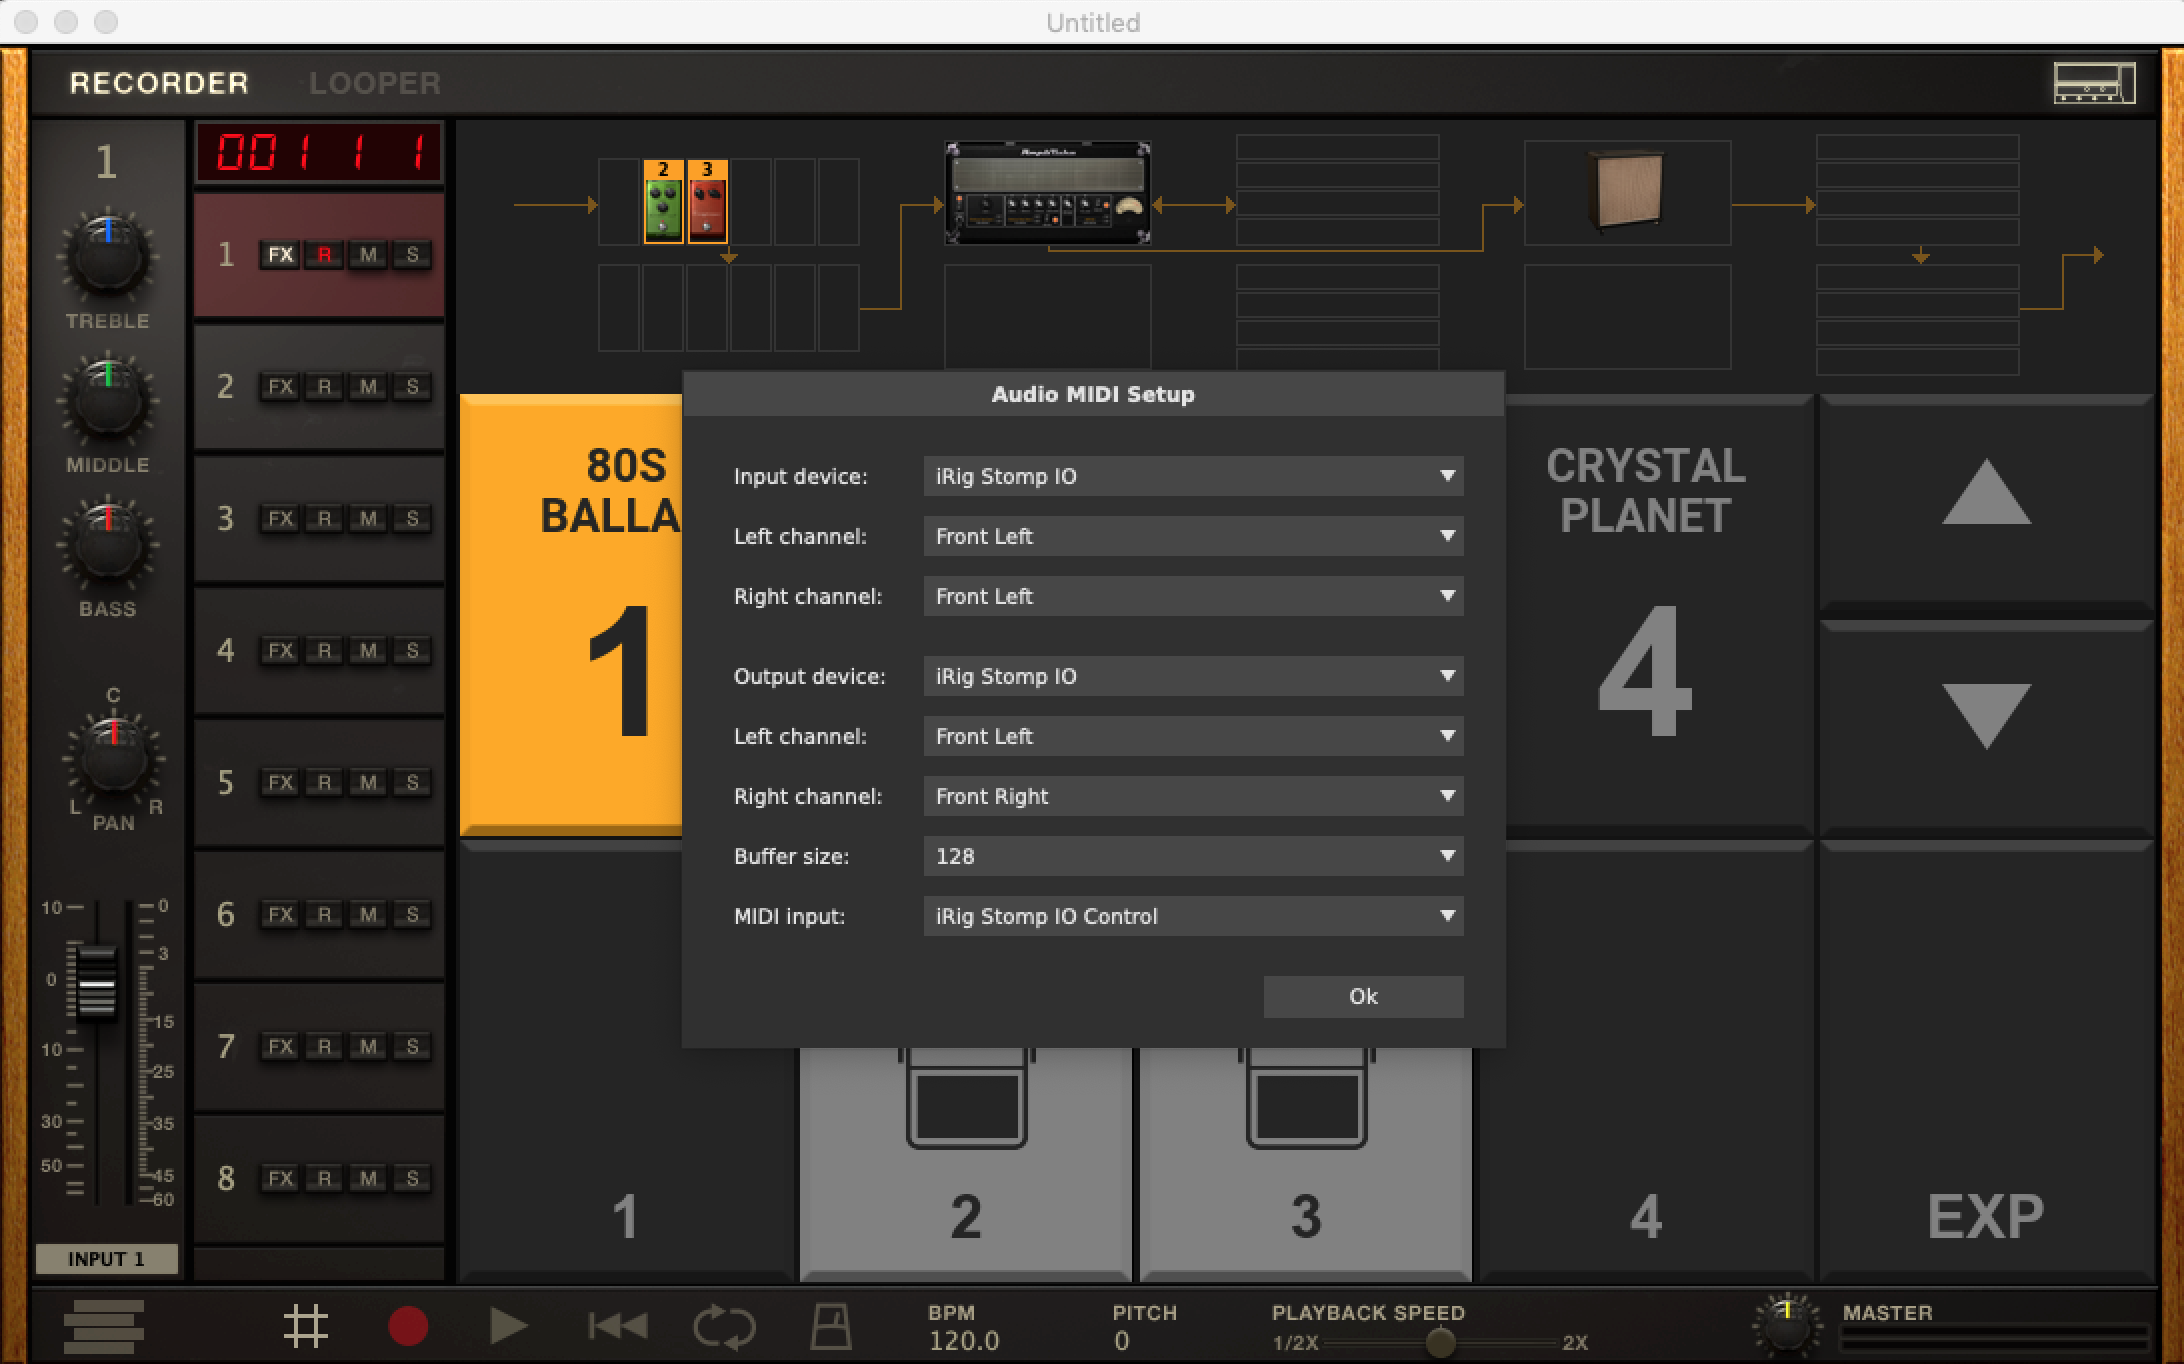
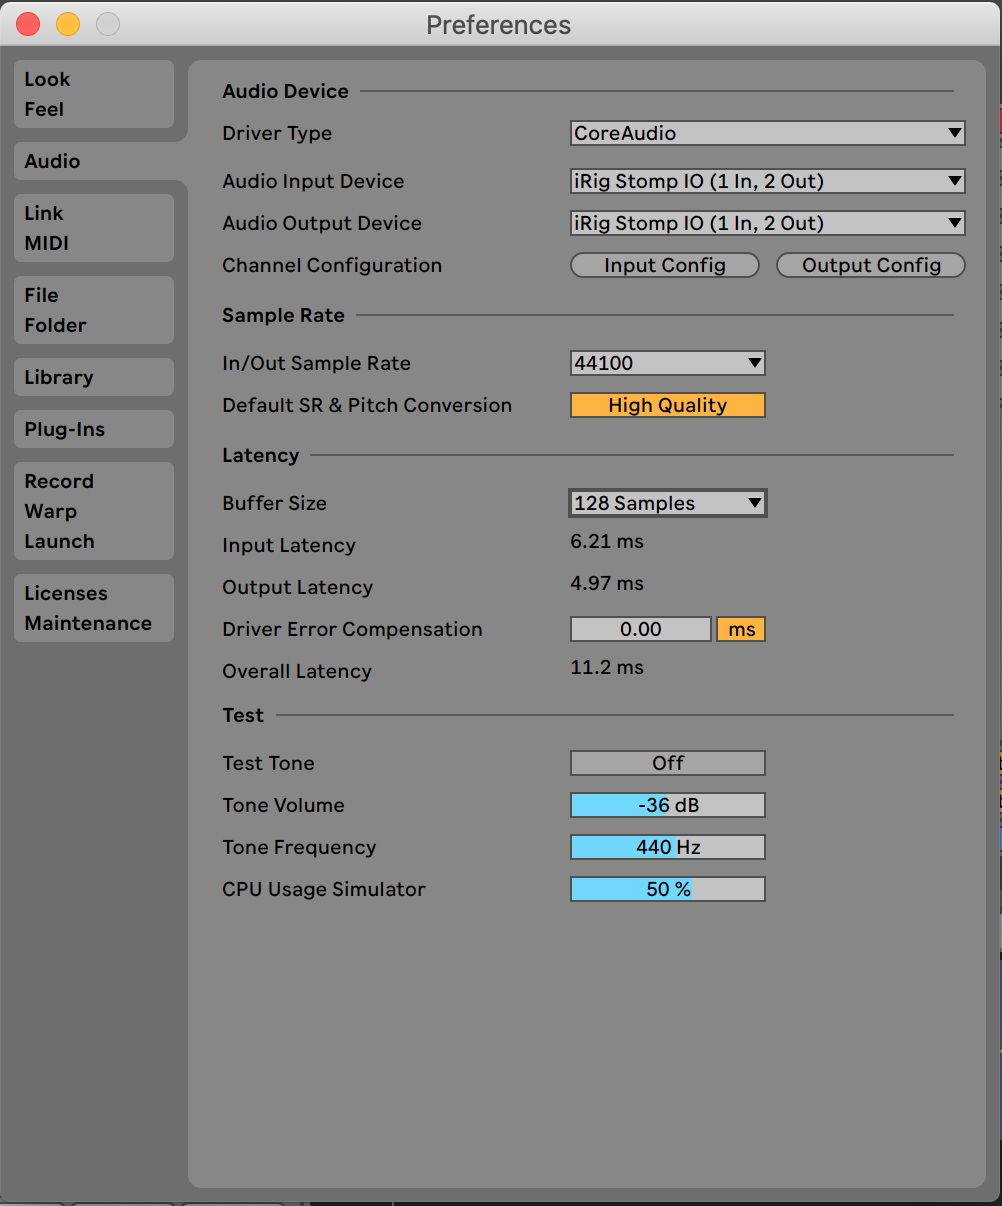
*Mac users will need to select their iRig as their audio input in their software. Below is an example of AmpliTube 4 and Ableton Live Lite. If you don't hear audio on macOS 10.14 or later, check this FAQ for help.
**After launching AmpliTube CS, or VocaLive CS, select "Allow" when asked for microphone permissions. If you don't hear input for any reason, check this FAQ for some help.
**After launching AmpliTube CS, or VocaLive CS, select "Allow" when asked for microphone permissions. If you don't hear input for any reason, check this FAQ for some help.
To get started with an MIDI based iRig on iOS or Mac follow these steps. For compatible devices, Windows set up will be very similar. Windows users are suggested to use ASIO based audio drivers for our Virtual Instrument programs like SampleTank 4 or MODO DRUM.
- Register your iRig device to unlock any included software. An email will be sent to you showing what you've just unlocked. Click here for a full how-to on unlocking and downloading your iOS, Android, or Mac/PC software.
- Connect your headphones or speakers to your iRig, then connect your iRig to your iOS or Mac system and launch your associated software. If your iRig does not offer a headphone port, connect to the iOS headphone port.
- Mac users will need to select their MIDI device in the Audio MIDI set up for the software being used.* iOS users can get started right away when using an IK Multimedia app.**
- Get started making music.
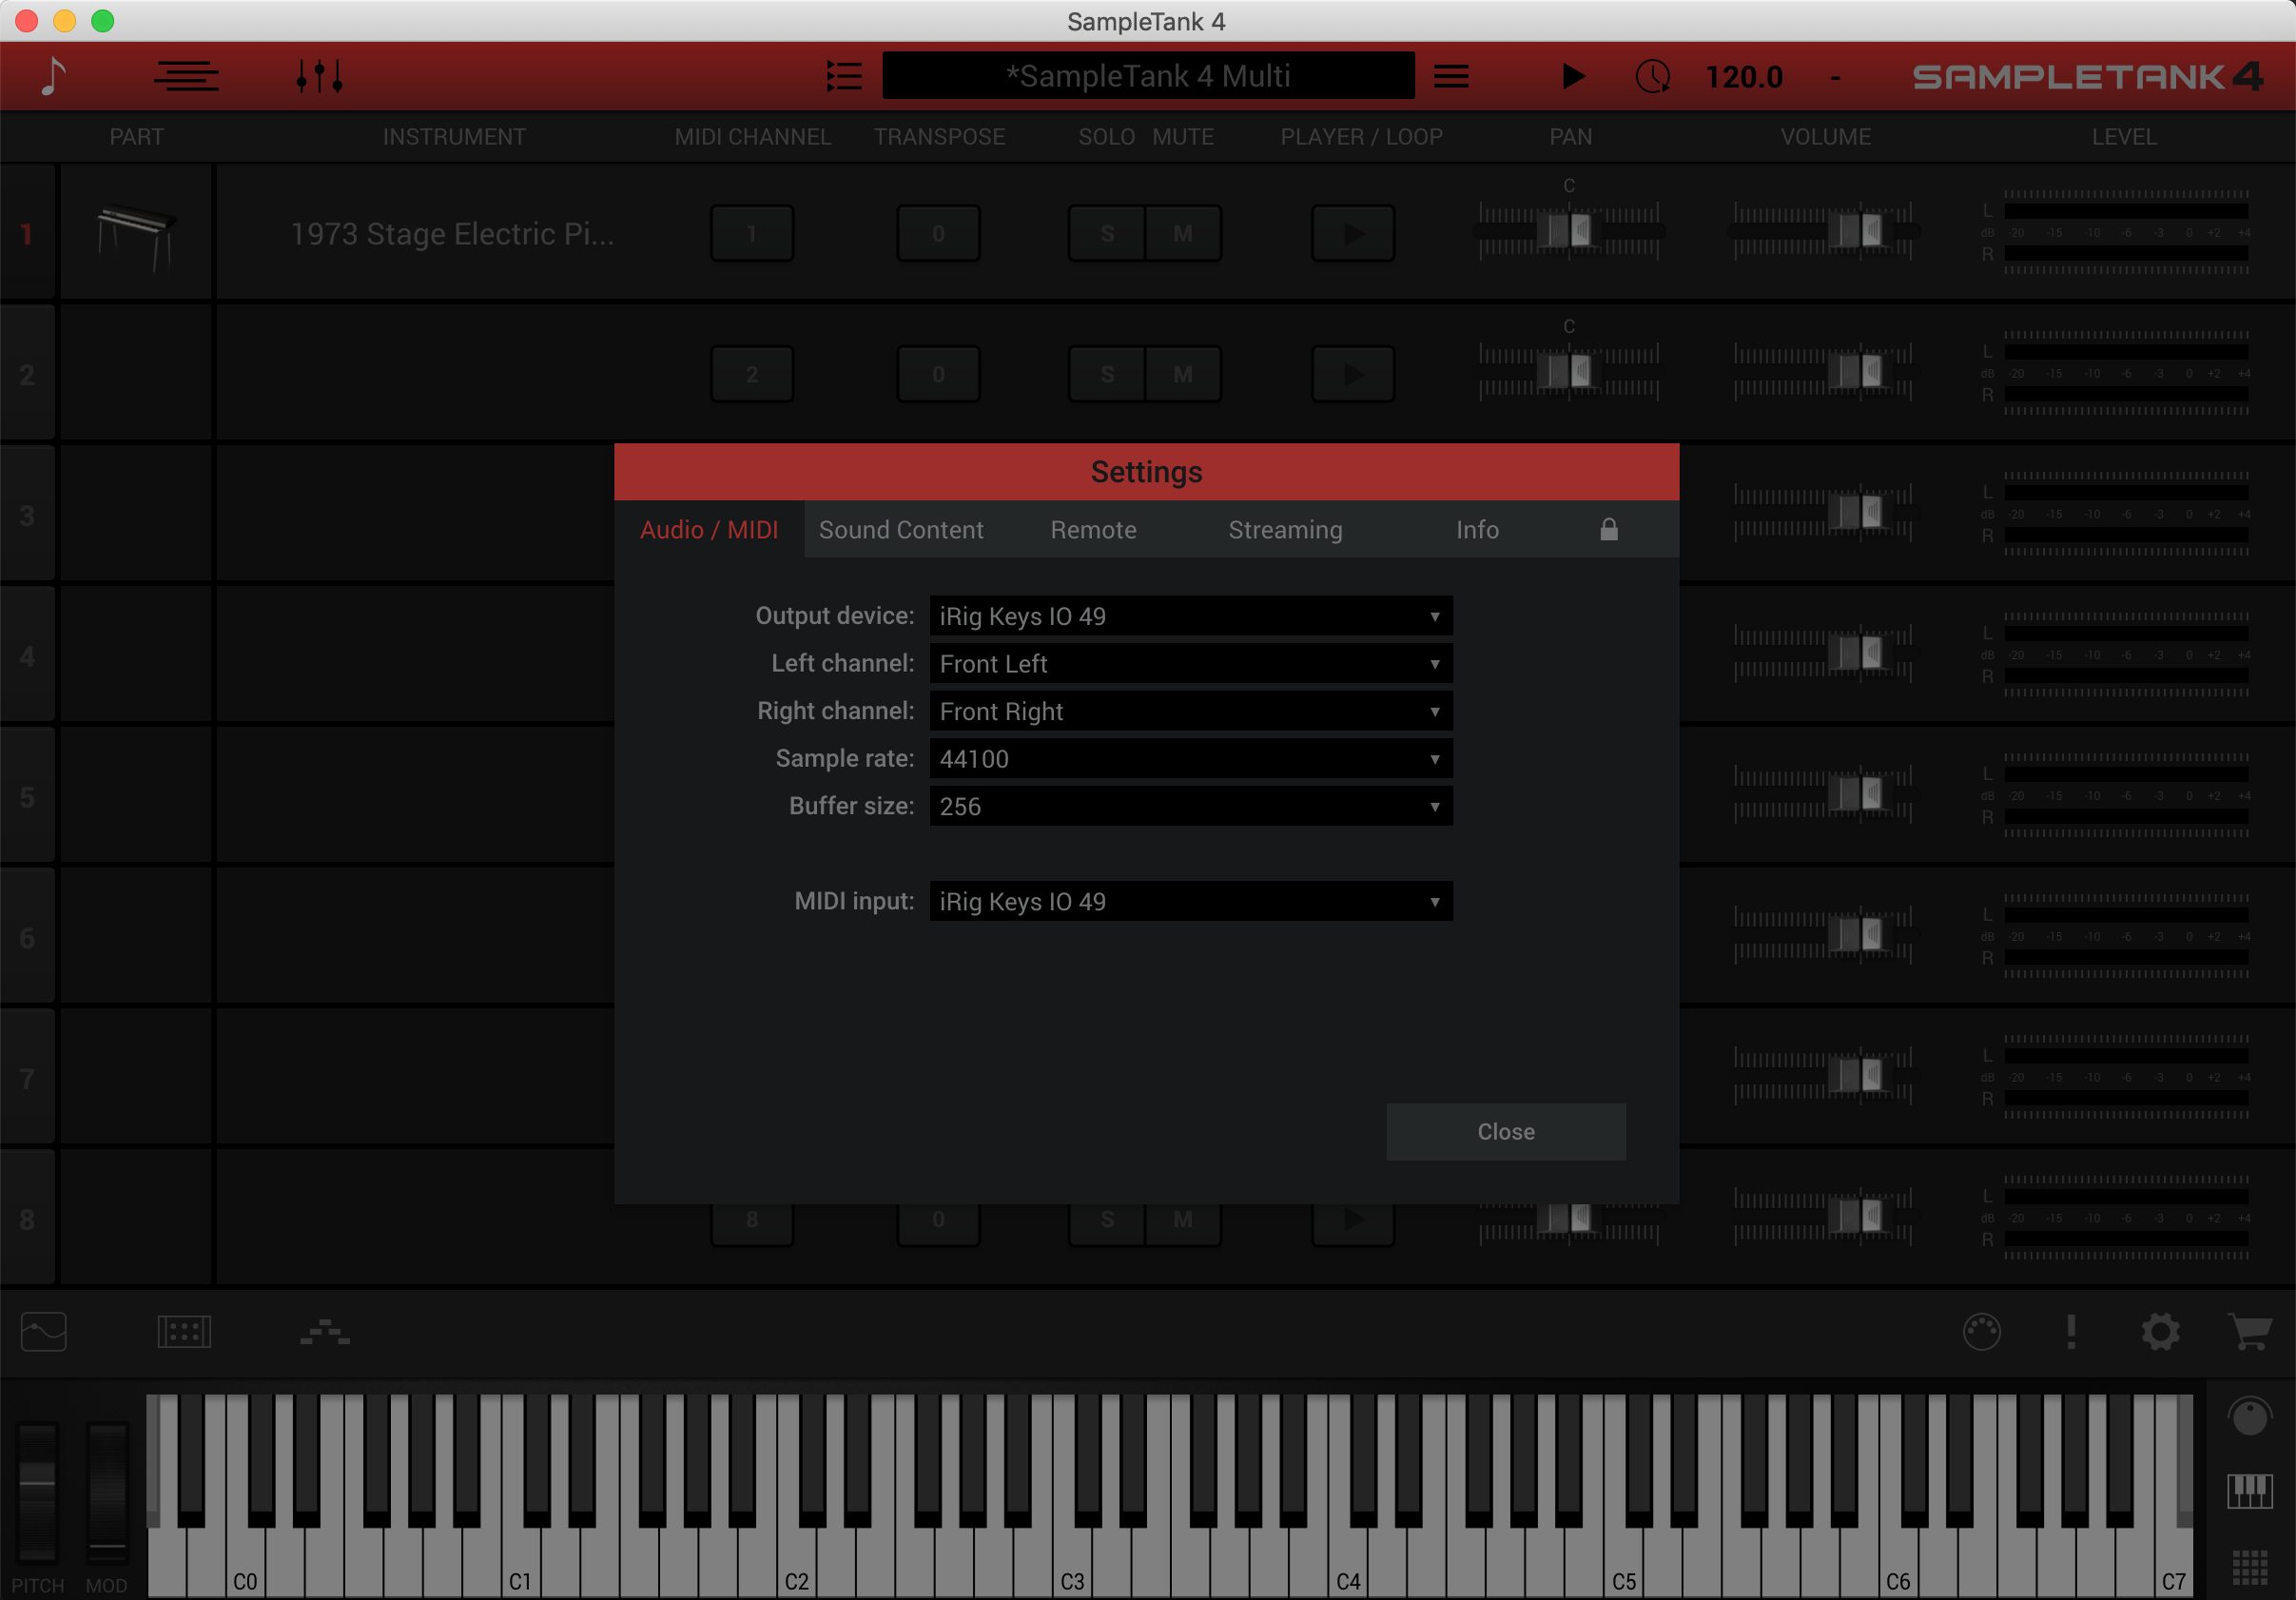
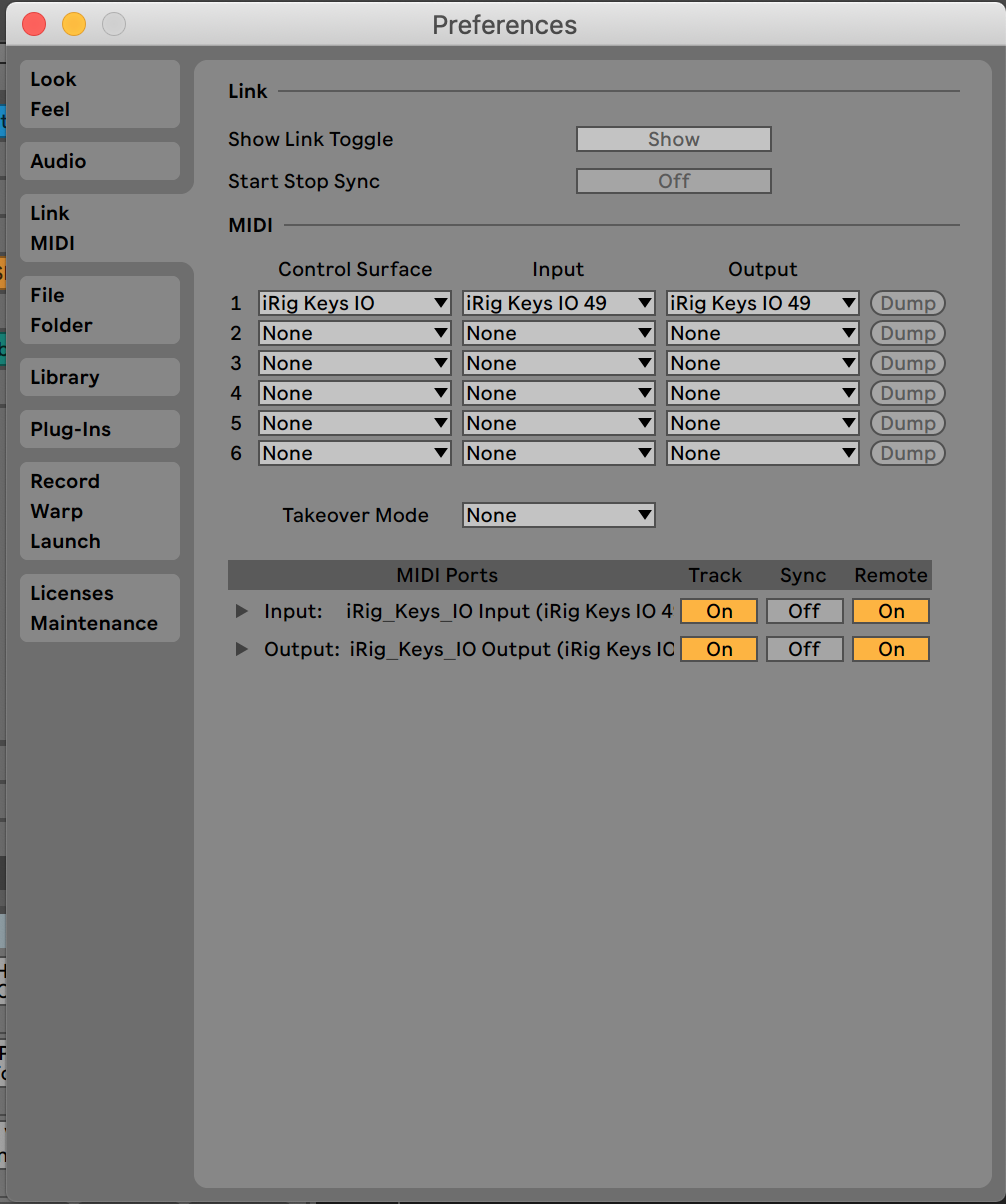
*Mac users will need to select their iRig as their MIDI input in their software. Below is an example of SampleTank 4 and Ableton Live Lite. If you don't hear audio on macOS 10.14 or later, check this FAQ for help.
** If you don't hear audio for any reason, check this FAQ for some help.
** If you don't hear audio for any reason, check this FAQ for some help.
If you need extra hep after reading this FAQ, please contact support here.
FAQ ID: 1263


