Optimizing Windows 10 for recording and editing audio
When using Windows for audio, it may be best to make some optimizations to allow for the best performance of your products. This guide goes both over a step-by-step approach as well as an informative approach to optimizing your system.
- Turning off Windows Sounds
- Windows Power Settings
- Windows Performance Options
- Maintaining your system
- Removing Bloatware from your system
- Disabling & closing any unnecessary background apps
- Disabling any unnecessary background services
- Setting the appropriate Sample Rate & Bit-depth
- Setting the appropriate Audio Buffer Size
- Staying up to date!
Turning off Windows Sounds
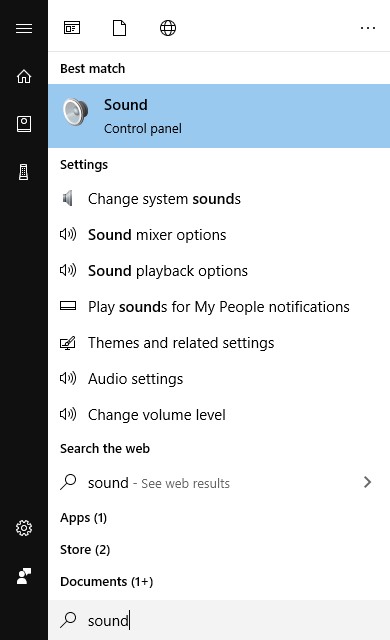
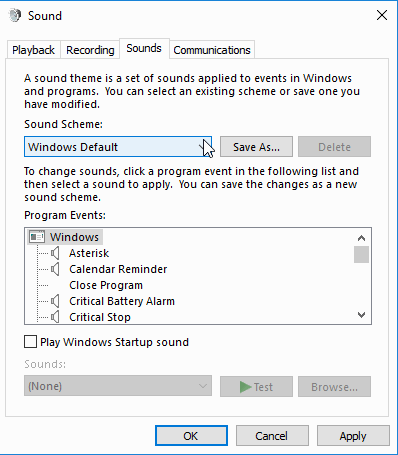
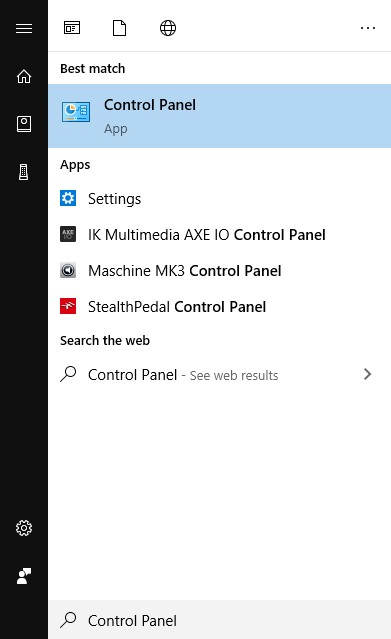
- Click the Windows logo or Start Menu. Type "Sounds" to enter the Control Panel -> Sounds menu. Inside here use the "Sounds" tab to select "No Sounds" as your "Sound Scheme".
Windows Power Settings
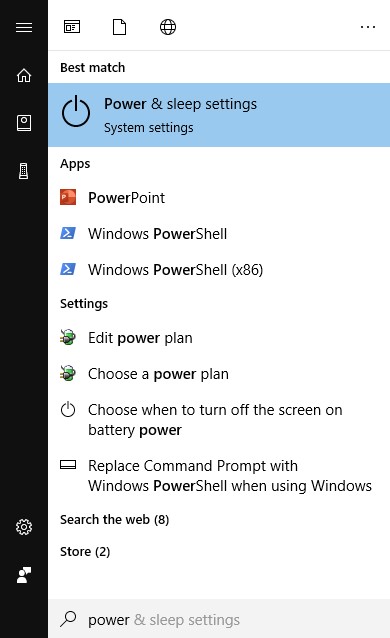
- Click the Windows logo or Start Menu. Type "Power & Sleep Settings". In the newly opened window, select the "Additional Power Settings" option. Inside this window you will be able to select "High Performance" mode. This is preferred for the best performance from your system.
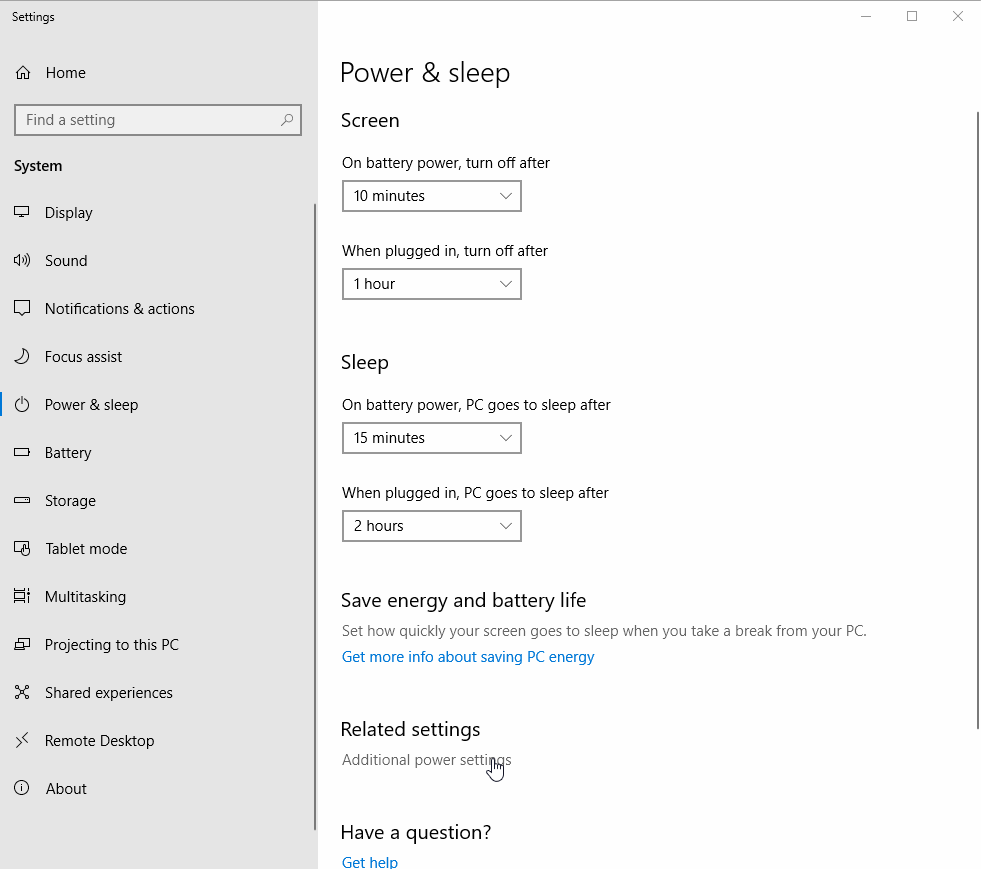
NOTE: The "Additional Power Settings" window will offer an option to "Change Plan Settings". For additional optimizations you can use this window to make sure your USB ports are not turned off for any reason during use which can cause disruptions to your workflow or cause connected peripherals not to operate as they should.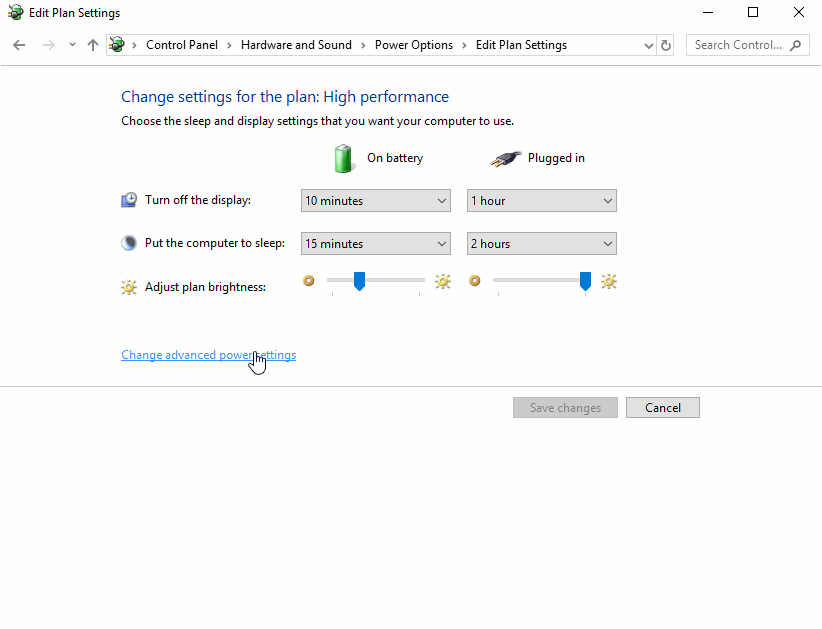
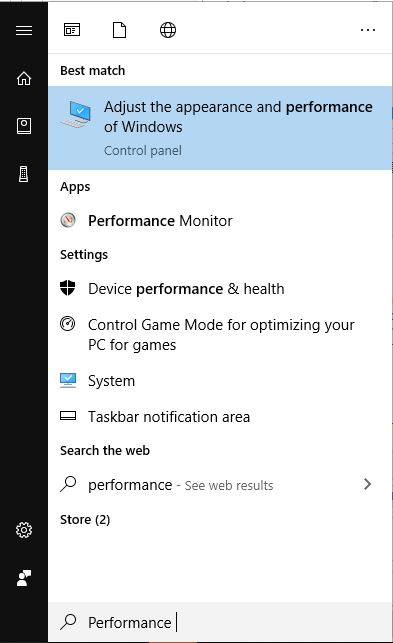
Windows Performance Options
- Click the Windows logo or Start Menu. Type "Performance" and select the "Adjust the appearance and performance of Windows" option. This page will offer the choice to "Adjust for best performance". This is suggested to allow for the most resources to be used for audio, rather than other settings which you may not need at the moment.
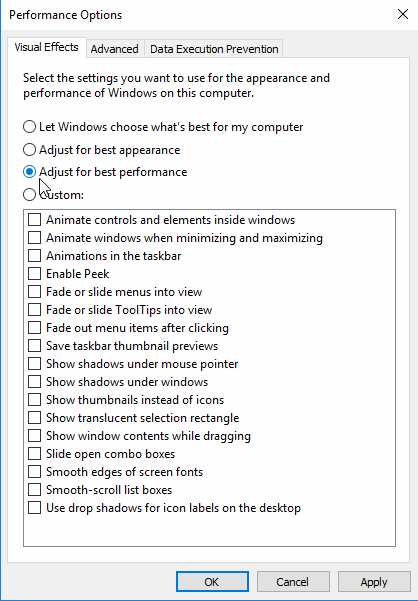
NOTE: In this page you can use a "Custom" option to find a good in-the-middle option for your usage.
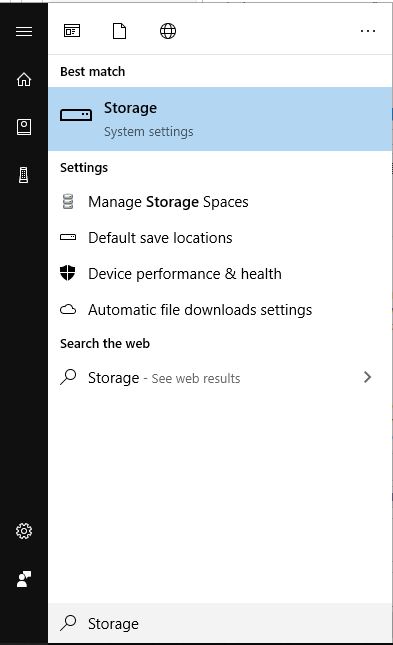
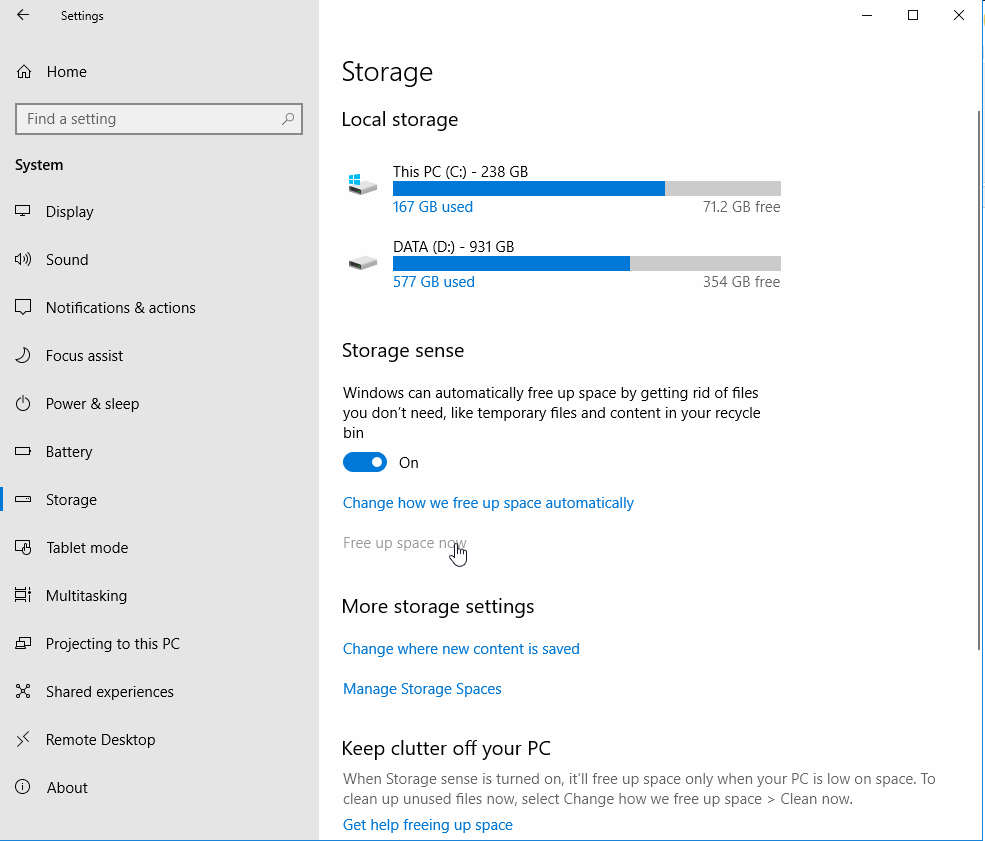
Maintaining your system
-
Click the Windows logo or Start Menu. Type "Storage". Select the Settings option which appears. Use this window to "Free space now". This will clear temporary files, the recycling bin, as well as any other remaining files which may not be needed on your system at this time.
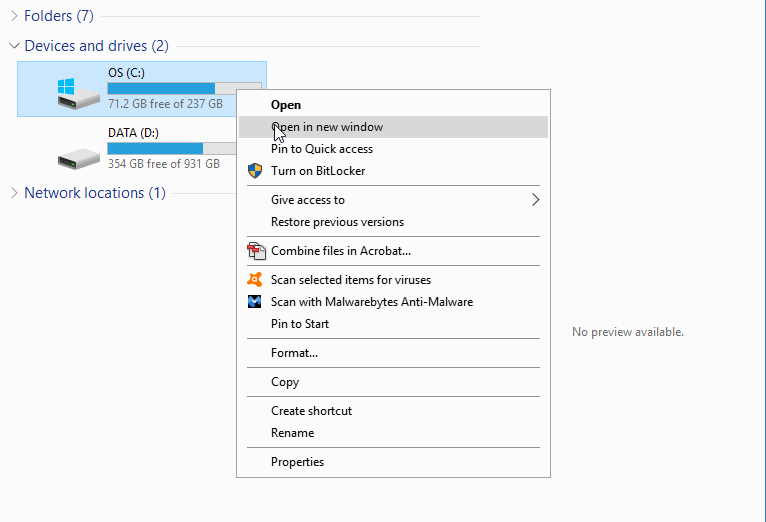
- Using a File Explorer window, go to your available drives. Right click each and go to "Properties". Inside here you can use the "Disk Cleanup" option, which is similar to the point above, then you can use the "Tools" tab to "Optimize and de-fragment" your drives. This can take some time, so this is suggested to be done at the end of the process or when you won't be using your system for some time.
- Perform an antivirus and malware scan regularly to ensure the computer isn’t infected.
- Consider using Microsoft’s built-in antivirus software Windows Defender and uninstalling third-party antivirus software. These tie up a lot of resources, can cause installation issues, and cause software not to run correctly.
- Make sure there is open space on both your main drive and the drive you are using to save your audio files or sessions. Do this by deleting unnecessary files and clearing your recycling bin regularly.
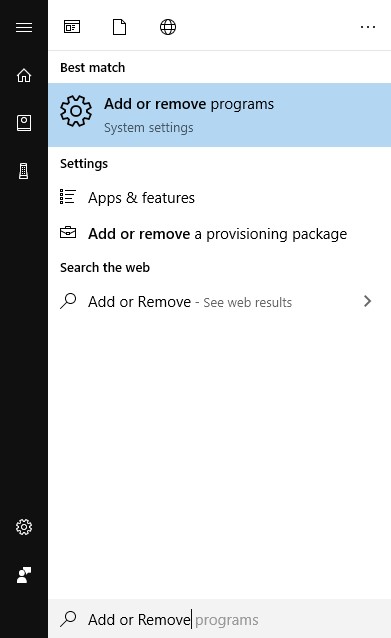
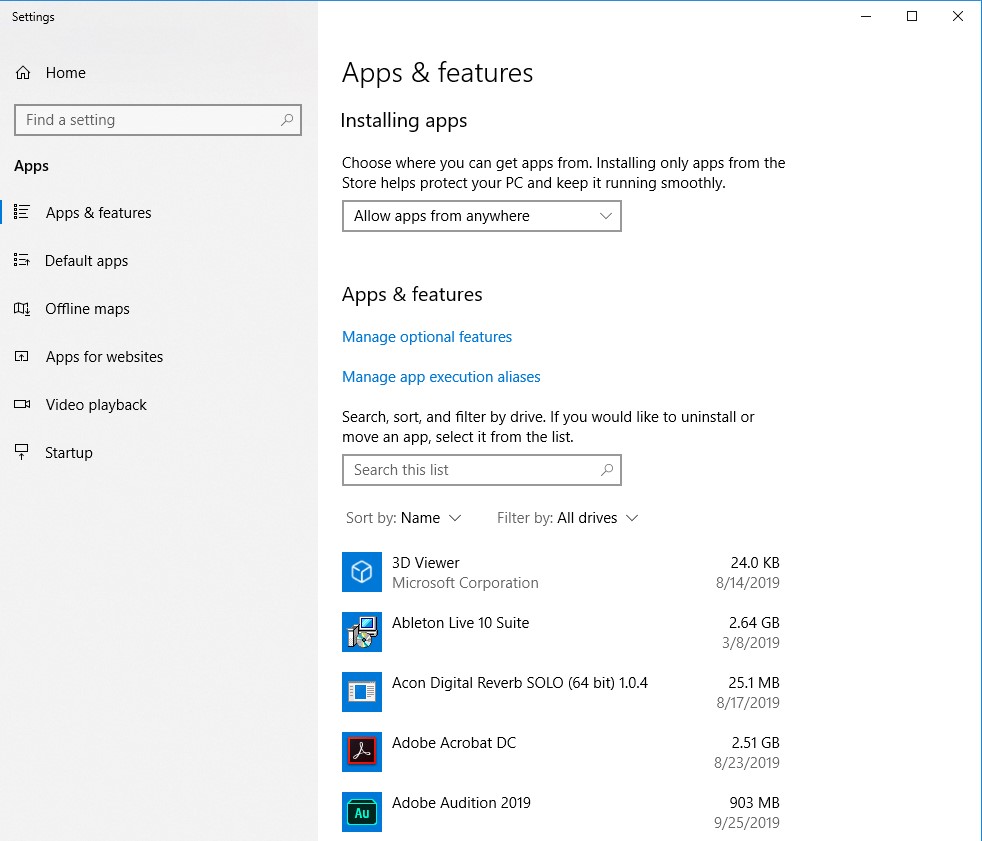
Removing Bloatware from your system
- Click the Windows logo or Start Menu. Type "Add or Remove Programs" and select the option which appears. Using this menu, remove programs which are pre-installed with pre-configured computers, which is known as bloatware. These are unnecessary programs which take up a lot of hard drive space and can use a lot of memory.
- For a more in-depth look at the same process above click the Windows logo or Start Menu. Type "Control Panel". Use this section of your system to enter the "Programs" sub-section's "Uninstall a program" option.

Disabling & closing any unnecessary background apps
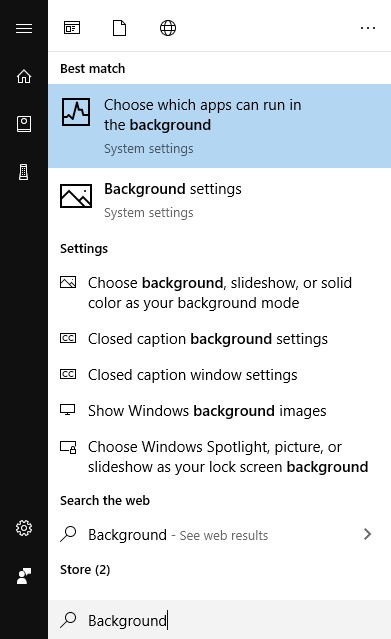
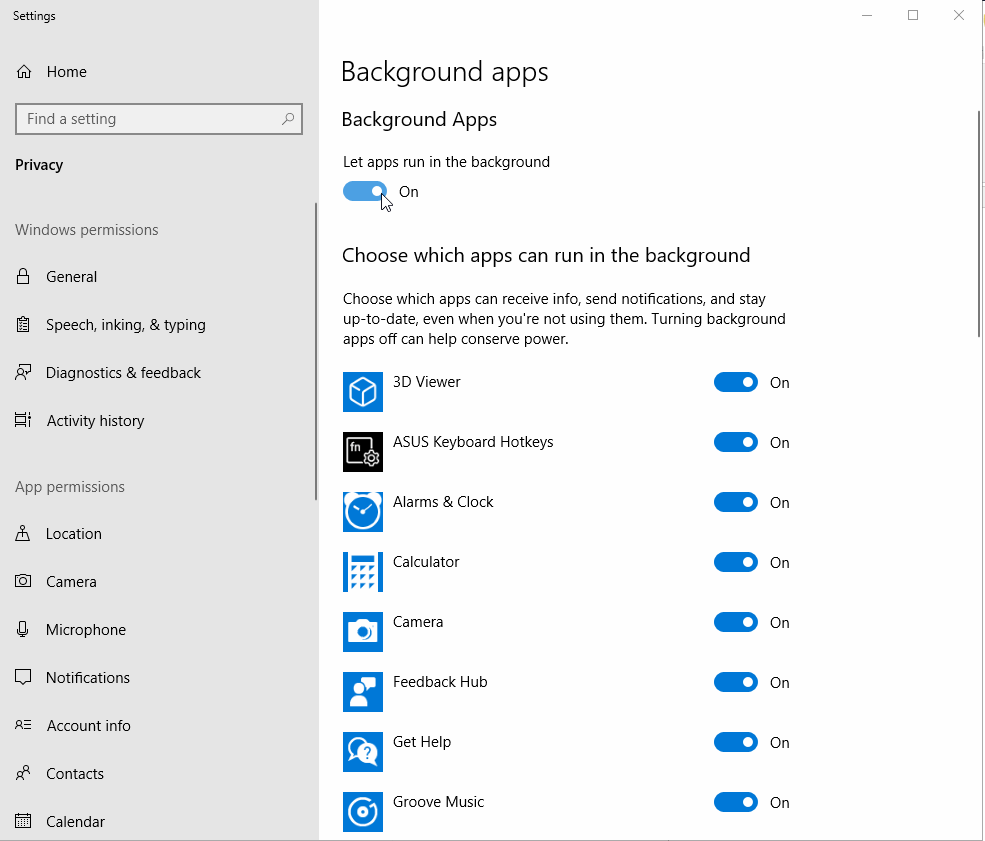
- Click the Windows logo or Start Menu. Type "Background Apps" to "Choose which apps can run in the background". Inside this window you can select the apps you wish to use, or even disable this entirely. Use the "Let apps run in the background" slider to turn this function off. This is the preferred option.
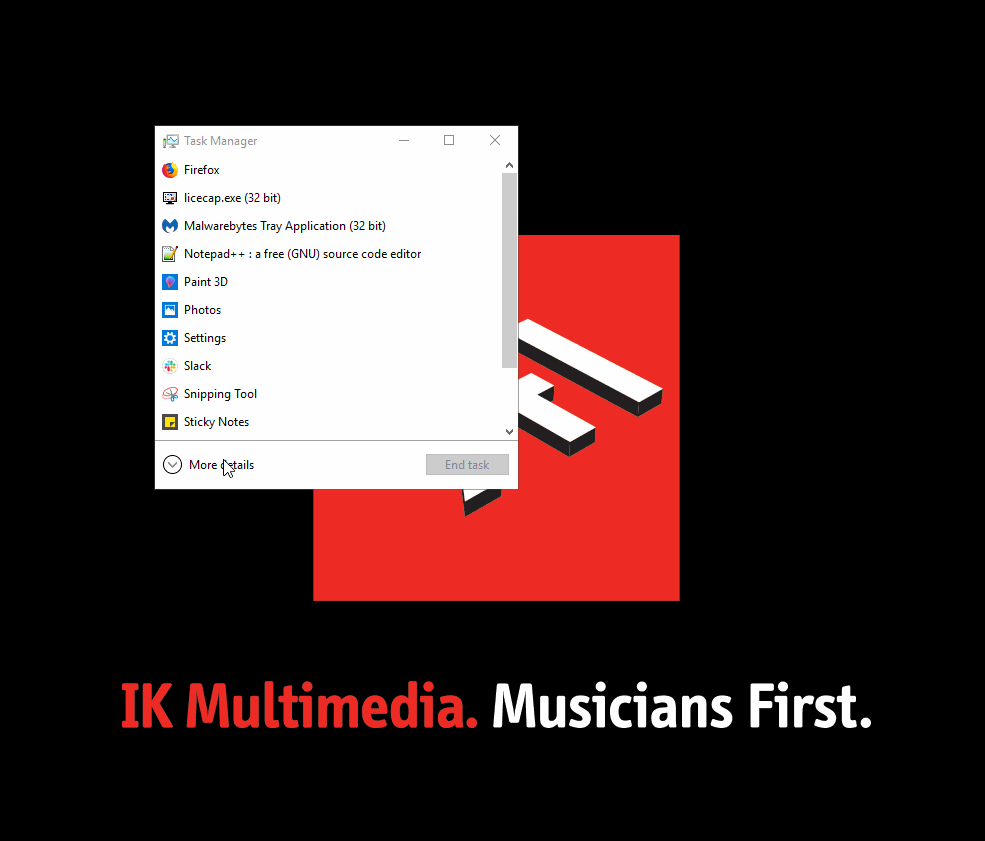
Disabling any unnecessary background services
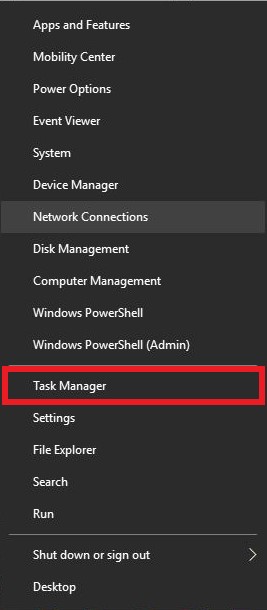
- Right-click the Windows logo or Start Menu. Select "Task Manager". Inside here disable non-essential third-party start-up "Processes" or "Services" such as: Skype, SpotifyWebHelper, OneDrive, and iTunes.
Setting the appropriate Sample Rate & Bit-depth
- When recording it can be tempting to set the Sample Rate as high as possible. Doing so however can affect your system's performance. If you system has any trouble running any particular projects or sessions, try lowering your Sample Rate. This will reduce the amount of DSP being done in real-time. "Red Book" Standard audio or CD quality uses a Sample Rate of 44.1kHz with a bit-depth of 16. Studio Quality can be considered at 48kHz and a setting of 24 for bit-depth. This can be taken to the next level when resources are available to 96 kHz or 192 kHz with 32-bit floating point as the bit-depth setting.
- On top of performance, a larger Sample Rate or Bit-depth will cause your files saved to be larger, as they contain more DATA. If you do not have a very large drive for storage, it may be best to use lower settings when recording.
Setting the appropriate Audio Buffer Size
- When recording, mixing, or mastering an appropriate Audio Buffer Size is necessary to create a nice easy work flow as well as the best experience. During Tracking (Recording) it is suggested to use a lower Audio Buffer Size. This allows for less latency (Delay between what is played and what is heard) when recording which can allow for a better, more accurate performance. We suggest starting at a 512 Audio Buffer Size, then reducing this until a good middle-ground is found. Personally, I prefer 128 or lower, but some performers can play well with a 256 Audio Buffer Size. However, during Mixing or Mastering, a lower Audio Buffer Size is not required. This is because you will not be monitoring live audio input to your system. In this case, try using an Audio Buffer Size anywhere from 512, to 1024, or 2048 when available.
Staying up to date!
- Always stay up to date with your IK Multimedia software, host program (DAW) software, and operating system! When updating, always check your software's compatibility to ensure you do not update to an incompatible operating system or host program.
IMPORTANT: If you are running Windows 10 build 1903 and haven’t updated yet, Be sure to install this update manually as it fixes many DPC latency issues.
Back to the top
Please contact our support team if you need further assistance after reading this FAQ.
FAQ ID: 1277


